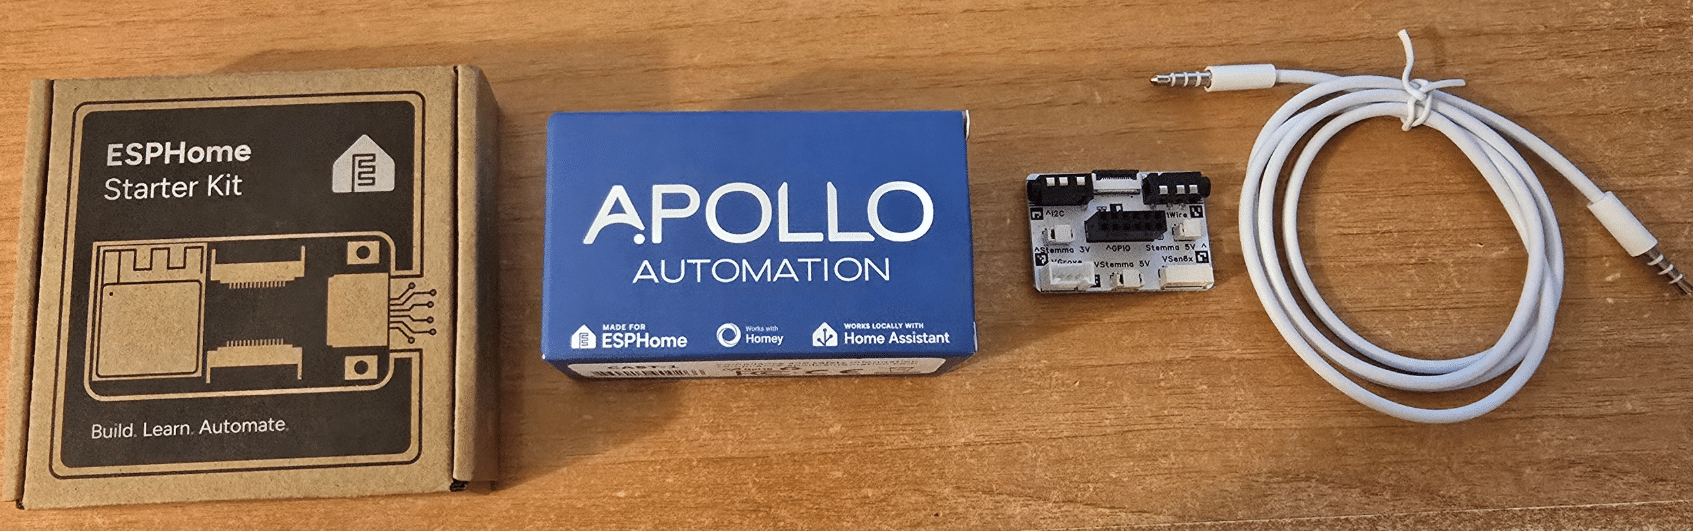
No, this is not an ad .. I was just grasping at straws for a title 🙂 This morning a somewhat unexpected package arrived for me at the local tobacconist. Lots of pieces from Apollo Automation – an American company I stumbled upon in 2024, just as I was becoming fanatical about LD2410 radar modules.
They have a number of devices that they based on that and similar presence-sensing chips – and so far apart from custom-3d-printed cases are good, but which never look as good as mass-produced ones, I said that I think that their Air-1, MTR-1 and Apollo R Pro-1 devices are among the most exciting sensing devices that I have ever come across. I have a load of reviews, including one on a really neat Christmas tree toy that they’re giving me back in 2025.
I said this wasn’t an ad but…I know…but I really like these guys. Which brings me to my next point – how can I get this package marked “Observaciones – Free Circulation within EU” from a USA company, here in sunny Spain, without problems, DHL-WORLD-POLICE notifications or incredible OTT Fedex emails, when everything coming from China is treated as suspected terrorism?
I could go on endlessly, but I won’t for fear of losing you – to the point… I received a package of bits today (above) including an ESPHome starter kit, CAST-1, Apollo breakout board and 3.5mm audio/aux cable. At the time of writing I don’t have a clue about any of these things… but read on… it’s fair to say the last thing I need after my recent blogging stint on ESPHome is an ESPHome starter kit – but hey – why not. Great excuse to write about the basics.
I wondered what the big board on the left was all about when I just turned it over.

Turns out it’s not one board, but several, including one with a bunch of pretty lights around the outside, reminiscent of the Christmas trees they sent me last year. Okay, well, everything with lights on it, I’m ready, so I’m going to tear this apart and show you the individual pieces.
The big board has 10 LEDs on it, a buzzer and a connector. It actually says that the LED and buzzer are module 5, there is a board with nothing but two connectors, then there is a board with a button and a connector on it and finally an AHT module, which is I2C at address 0x38. This has a plug and an AHT chip on it, and precious little else. Supplied with the kit are three leads, one of which appears to be a spare, to connect the various pieces together.
The heart of all this is an ESP32-C6 Mini 1 with a USB connector, some buttons, and three general connectors on it that attach to the rest. I’m guessing all this because as usual I leave the instructions as a last resort, but I haven’t used an ESP C6 yet, so this might be interesting. However, it is all documented on a link that is on the main board: ohf.2/esphome/starterkit. I’m not sure what the OHF.2 was all about, but I included the link to the starter kit. The link above describes the AHT module, which is, as you would expect, temperature and humidity.
Rather than browse here for decades, I’ll point you to the relevant pages. Apollo have done a cracking job of explaining all of this. Meanwhile I’m dying to try out that LED/buzzer module as I’m something of a sucker for flashing lights, the first thing I ever did commercially (when I was working on what used to be called a video jukebox) was to create the wall mount control unit. My use of LEDs in the pub wall-mounted remote has garnered more interest than all electronics and technology combined. Everyone loves the flashing lights.

After that I was sent to Tokyo to support the sales team and you can imagine what I remember from that trip. But I digress.
Meanwhile I’m sitting here putting together the ESP32-C6, Light/Buzzer module and IR sensor – I THINK it’s impossible to mount this the wrong way around. time will tell.
Done – all I need now is a piece of code to flash the lights…could it be that easy? Look in that link at the end where it says “next – first step”…
No – I failed – but hey – this is the age of ChatGPT – so I went to chatGPT and simply asked “Where on the esphome website is the example using the Apollo ESPHOME Starter Kit to flash the Apollo lights on the esp23-C6?”
AND … the Apollo Starter Kit page – and so back to my ESPHOME installation in Home Assistant (as in “all roads lead to Home Assistant”) – New project – you get a choice of an empty ESPHOME project or directly to – as one of many options – the Apollo Starter Kit.
Hard to go wrong, really. About the only way you can go wrong is not understanding how to find a spare USB port to begin with…

SO I blindly hit SELECT on that starter kit… and plug the SP32 board into my PC USB spare port with the Windows button followed by DEVICE manager to find which port I just added. COM29 as it happens.

I did NOTHING and that’s it – assuming I have a secret page in ESPHOME, which I do – for my WiFi .. there’s also assuming I’m paranoind and want API encryption – so that section that starts API: comes out – I just leave in the one line “api:”

At this point I hit SAVE then INSTALL – PLUG INO THE COMPUTER – which is not my Home Assistant machine – it’s the PC whose browser talks to the Home Assistant and who the serial port I use for the Apollo board. Wish me luck….
COMPILING FIRMWARE is fully automated and doing the basic ESPHOME generic setup for this board takes maybe 2 minutes on my average PC. Now it asks to open the USB flasher and wants to know which COM port I found in the DEVICE manager…
I did that – and had what looked like a working board, but who could say – so now there is no need for the serial connection – updates from WiFi from now on – so I went back to the configuration and added the RGB LED + buzzer module just by lowering it … the board in – run INSTALL (“over the network” option) in ESPHOME – and a few minutes later …

I saw on the WebUI that appeared on the board address – RGB LEDS – I hit the ON button .. and …

So next I checked the white block which looked like it was a color control…. Note the lead change – the first time the board crashed – it occurred to me that maybe the 10 LEDs were too many for my no longer required PC serial port and so moved to a standard USB charger app… OK that’s nice…

and now – the nice plastic stand they supplied with the starter kit…

and now – back to the ESPHOME PROJECT PAGE – SHOW ADVANCED SETTINGS – you know what comes next…

I want a rainbow…

It can’t be THAT easy – really – all I did was select addressable rainbow from the list and ESPHOME dropped another line of code…
I have started another compilation.. as I type this the LEDs have gone dead… (turned off – of course – and the code is being uploaded) – GOOD GRIP – there is now a drop down box – what does it contain?

WEEEE – I love it. My favorite – RAINBOW. I guess I could add as many items to dropbox as I want – just by dropping them – there’s even a WLED option but that’s more than a 2 second story…
Enough – this is so much fun for so little work… but pub calls…